Baking bread has been around for ten thousand years (literally). Being that it uses so few ingredients, there’s a version of it at the heart of almost every culture. In recent years, more home cooks have taken on the labour-intensive and ever-rewarding task from within their kitchens. For experienced bread-makers and beginners, the new Bread Oven elevates the experience and the results.

Meet the Bread Oven
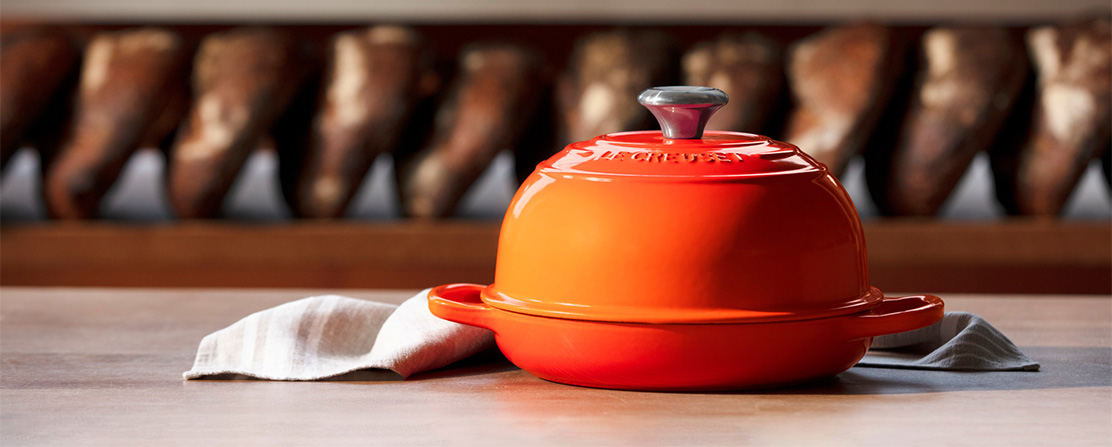
The Le Creuset Bread Oven takes home baking to the next level. Crafted from our legendary enamelled cast iron for superior heat distribution, this purpose-built shape with its domed lid traps and circulates steam to create bakery-quality results. This specialty piece is a great addition to the collection for those who already love baking bread in the French Oven and want to perfect the result.
Shop nowWhy It Works

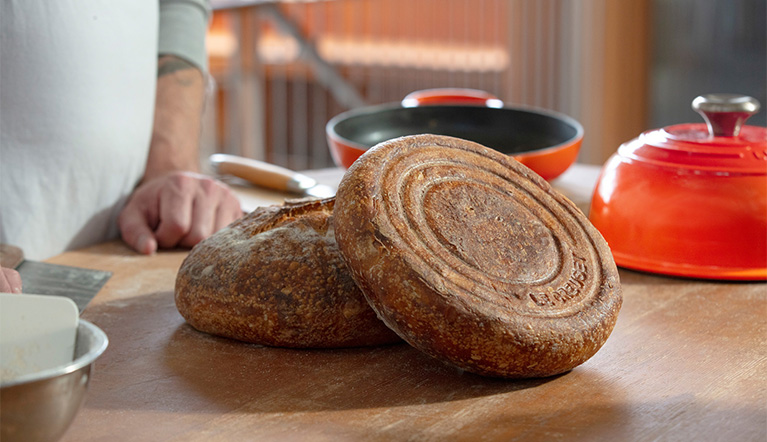
It's low profile base allows bread to brown evenly and adds the three hallmark rings to the bottom.

The domed lid allows steam to circulate and makes for the perfect crust and fluffy interior.

The matte black interior enamel is easy to clean and reduces sticking.
Making Your First Loaf
Baking bread is a lot simpler than you probably first imagine. When it comes to trying your hand at it for the first time, you first have to decide what kind of leavener you will use. From there, with practice, you can try new things which every loaf you bake, from shaping and scoring to adding flavours or mixing flours.
Get started by choosing your version:
Ingredients
- 4 cups (550g) all purpose or bread flour
- 1 teaspoon (7g) kosher salt or coarse sea salt
- 1 teaspoon (4g) instant yeast
- 1 1/2 cups (360g) warm water (between 90°F-100°F)
- Olive or vegetable oil
Directions
Whisk together the flour, salt and yeast in the bowl of a stand mixer or large mixing bowl. Add the water and stir on low speed with the dough hook attachment for about 1 minute (or stir with a spatula). Increase speed to medium and knead until the dough is smooth and elastic, about 8-10 minutes (or alternately, knead by hand). Every few minutes, stop the mixer and scrape the dough off the hook and sides of the bowl. When the dough appears smooth, cut off a small piece and stretch it. If it stretches to the point of transparency, it’s kneaded enough. If not, continue kneading.
Remove the bowl from the stand mixer and cover it with a pot lid or plastic wrap. Allow the dough to rise until it has doubled in size and does not spring back when you push your finger into it, about 1 1/2-2 hours (less if it’s hot and humid, more if it’s cold).
Turn the dough out onto a lightly floured work surface and knead about 1-2 minutes to release the gas. Shape the dough roughly into a ball, cover with a clean towel, and let rest for 10 minutes.
Cup your hands around the dough and shape it into a tight ball by rolling it on the work surface between your palms. Lightly brush the base of the Bread Oven with oil. Place the dough in the center of the base and cover with the lid. Allow the dough to rise again until roughly doubled in size and when poked with a finger will slowly spring back, about 30-60 minutes.
During the last 15 minutes of rising time, preheat oven to 450°F. When ready to bake, score the bread with a sharp knife or razor, making an X or a hash mark to allow the dough to expand freely. Cover and place in the hot oven.
Bake for 30 minutes. Remove the lid, reduce the oven temperature to 375°F, and continue baking for an additional 15-20 minutes until the bread is golden brown and cooked through. It should have an internal temperature of approximately 200°F when done. Carefully remove the bread from the base and allow to cool on a rack for at least 30 minutes before slicing.
Ingredients
- 335 grams warm water (90-100°F)
- 100 grams mature sourdough starter (see Note)
- 450 grams bread flour, plus more for dusting
- 50 grams whole-wheat flour
- 20 grams kosher salt
- White rice flour, for dusting
- Olive oil, for brushing
Directions
In a large bowl, using a wooden spoon or silicone spatula, mix the warm water with the sourdough starter. Stir in both flours and the salt until a shaggy dough forms. Using your hands, squeeze and mix the dough until evenly moistened and all the dry flour is incorporated.
Scrape the dough into a clean bowl. Cover and let rest in a warm part of the kitchen for 4 hours; stretch and fold the dough over itself every 30 minutes to 1 hour.
After the 4 hours, keep the bowl covered and let the dough rest in a warm part of the kitchen until increased by 50%, about 8 hours or overnight. At this point the dough should be supple and jiggly.
Very lightly dust a work surface with all purpose flour. Gently scrape the dough onto the work surface; do not flour the dough. Working your way around the dough, gently stretch the side out and fold it over the center, forming a rustic ball. Using a bench scraper, flip the dough so the folds are on the bottom and let rest for 15 minutes.
Meanwhile, line an 8 to 10-inch bowl or proofing basket with a clean kitchen towel and dust it with white rice flour.
Using a bench scraper positioned under the side of the dough furthest from you, gently pull the dough towards you across the work surface, rotating slightly as you drag it, to form a taut ball. Repeat this process 3 more times for a total of 4. Using a bench scraper, quickly and carefully invert the dough into the prepared bowl or basket. Lightly dust the top with white rice flour, cover, and rest in the refrigerator overnight.
The next morning, preheat the oven to 500°F for at least 30 minutes. Brush the base of the Bread Oven with olive oil. Invert the base of the Bread Oven onto the bowl or proofing basket, then quickly and carefully invert the dough onto the base.
If needed, dust the boule with white rice flour. Using a razor blade or a very sharp, thin knife, score the boule decoratively (1/4 to 1/2-inch deep). Cover the Bread Oven with the domed lid and place in the preheated oven. Reduce the temperature to 450°F and bake for 30 minutes, until the boule is risen. Remove the lid and continue to bake the boule for 20-30 minutes more, until golden brown. Immediately transfer the boule to a rack and let cool completely before slicing.
Note: You know a sourdough starter is mature when it has active bubbles and when 1 tablespoon of it floats in a small bowl of water.
What to Do With Leftovers?
Since practice makes perfect, when you first start making bread (especially with sourdough), you might be making more than you can chew. Here are some of our best ideas for making the most of your leftovers.
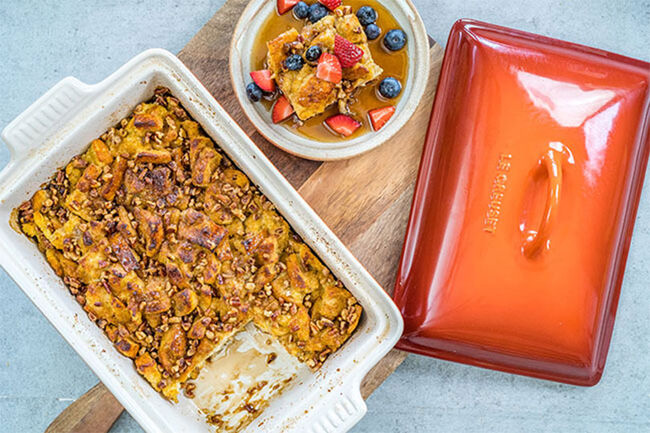
French Toast Casserole
Transform day-old (or older) bread into a delicious morning treat. Simply soak the bread overnight in a mixture of egg, milk, vanilla and sugar and bake it when you wake up. The result is a delicious cross between bread-pudding and french toast.

Ultimate Grill Cheese
Make the ultimate grilled cheese with those last few slices. If your bread isn't as fresh as you want, add it to a hot pan, spritz it with a little water and trap it with the lid to restore all its moisture!
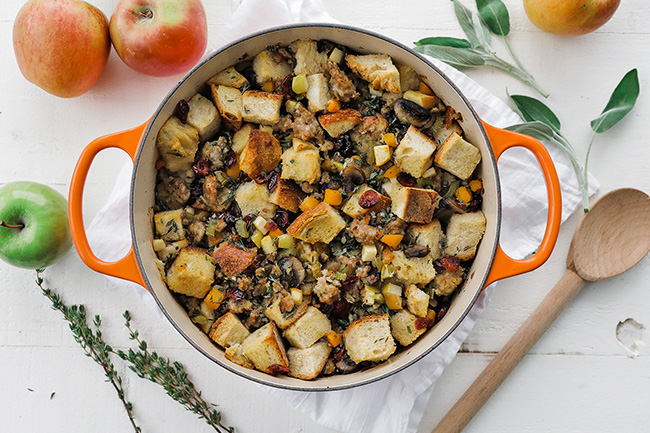
Bread Stuffing or Bread Crumbs
If you're bread really is too hard to eat as is, don't fret, there are still options! Toast up the chopped-up bread to make croutons - add some olive oil, salt, rosemary, and top salads or eat as a snack. Or throw them into a food processor for homemade bread crumbs. Finally, you can always use them as stuffing for a big holiday meal!